SUPER EASY DIY Lip Balm (Peppermint Burt’s Bees copycat)
Okay guys, so even though I can have a very high tolerance for tedious activities (I have been caught peeling the skin off my soaked almonds for over an hour…), I absolutely LOVE when I can find a way to make something awesome with very little effort.
Though I didn’t come up with the general recipe for this lip balm myself, I wanted to share my own version because I thought I came up with some pretty cool hacks along the way!
I have always loved Burt’s Bees Peppermint lip balm. But it’s so darn expensive! And, perhaps more importantly, it has a bunch of ingredients that are not ideal. So get this: a year ago for Christmas, one of the presents I asked for was a pound of beeswax pastilles from Mountain Rose Herbs. My sister was kind enough to order them for me! But it took me a year to finally MAKE the lip balm (sigh). I hate when I put stuff off!
And it was so silly for me to put it off, because this turned out to be SO easy! And it really came out just like Burt’s Bees. So let me show you guys exactly what I did.
My Research
I’ve learned that any good project typically starts out with a bit of research. This helps to avoid mistakes that can be costly if they waste expensive ingredients (such as beeswax).
All of the beeswax lip balm recipes that came up when I searched were calling for some kind of butter that I didn’t have, such as cocoa or shea. Somehow, I felt convinced that this recipe would certainly be possible with just coconut oil and beeswax, so I kept looking. Finally, I found a recipe that called for just that! And of course a bit of peppermint essential oil, too.
Method
Often we hear about using double boilers for melting down ingredients such as these in a gentle way. The great thing is, all you need is a heat-resistant glass container and a shallow pot/pan and you’re golden!
You just simmer some water in said pot/pan (I used a sauce pan with a few inches of water) and place a glass container of your choosing in the water. Good candidates are Pyrex measuring cups (the one-cup size is ideal), mason jars, or any other glass that is more heat-resistant. Mason jars can occasionally break in boiling water, but we all know they’re boiled before canning so they are technically designed for this application.
The ingredients
Check out this ingredient list of Burt’s Bees Beeswax Peppermint lip balm:

For me personally, I don’t like getting seed oils (sunflower, soybean, and canola) anywhere near my mouth. Especially soybean, since soy can affect my hormones. I also don’t know what lanolin and limonene are. They might be fine… but why include these ingredients when you could keep it so much more simple?
I made my lip balm with:
- Beeswax pastilles
- Organic unrefined extra virgin coconut oil
- Peppermint essential oil
- Vitamin E oil


The vitamin E is optional. From my research, I heard it can help preserve the balm, but honestly, I’d imagine that a mixture of coconut oil and beeswax would be pretty stable on its own. Personally, I just wanted the added moisturizing effects of the vitamin E.
Mixing the beeswax and oils
This is honestly the easiest part, and the most fun!
I started by melting some coconut oil in the microwave, as I find coconut oil to be much easier to measure when it’s liquid. Then, I added two tablespoons of it to my one-cup Pyrex measuring cup. I also added a couple drops of vitamin E oil from a gel cap (the bottled kind works too, of course).
All the recipes I found recommended two parts oil to one part beeswax. However, I found my balm came out nice and thick like Burt’s Bees if I added more beeswax. So, I added 1 tablespoon + 1 teaspoon. This makes it a 3:2 ratio rather than 2:1 of oil to wax (by volume). By weight, this came out to 24 grams of coconut oil to 11 grams of beeswax.
Then, I put the measuring cup in a sauce pan full of water. (Make sure the water height isn’t higher than the cup!) I’m always cautious when putting glass in hot water, so I put it in slowly. Once the water reached a boil, I kept the heat of the stove on medium-low. This was enough to slowly melt the beeswax in the already-melted coconut oil.


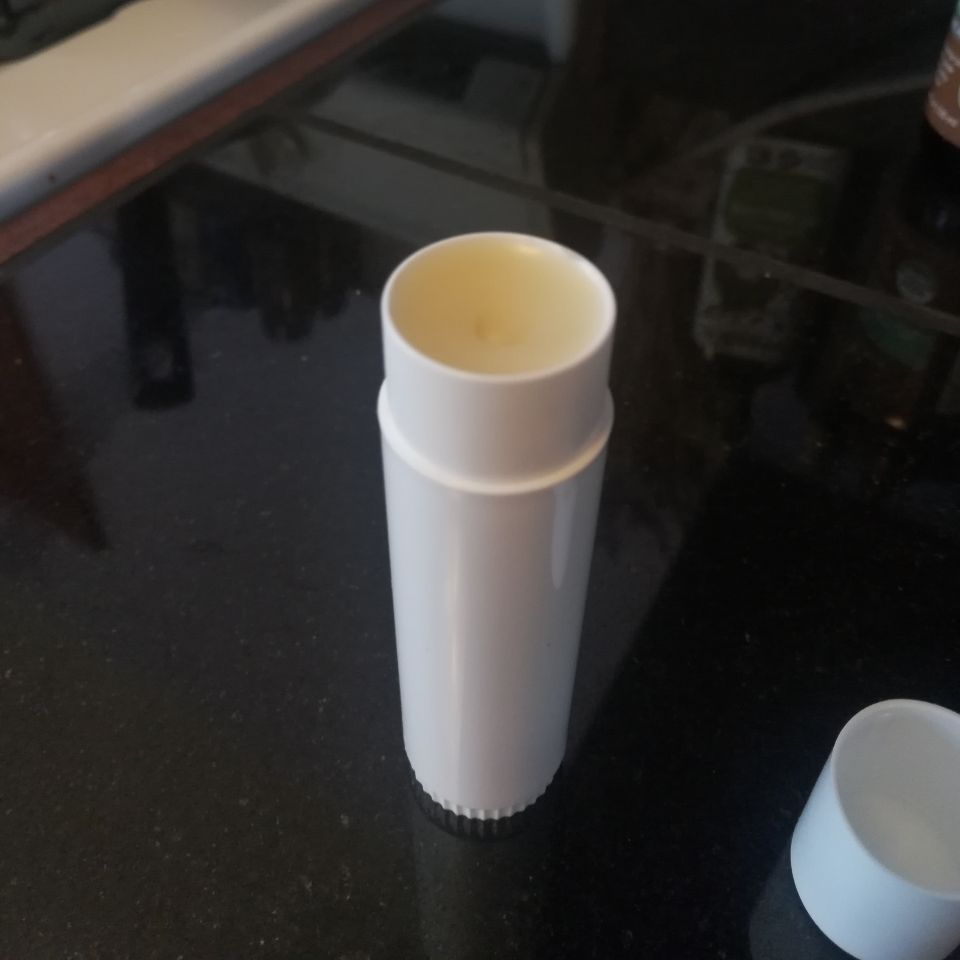
I’ve also used a little mason jar (this size) in place of the measuring cup, with the added benefit being you don’t need to pour the mixture – you can just keep it the mason jar for use! This time, however, I decided to pour the liquid into an old lip balm container for easier application.

Adding the essential oil
Once the wax and coconut oil were melted and mixed (I stirred it intermittently to encourage the pastilles to melt), I removed the glass container from the frying pan. I added about 12 drops of peppermint essential oil and stirred. Then, I poured it into my lip balm container.

It surprised me how quickly the mixture solidified! Maybe about 10-15 minutes. It is winter here, so maybe that had something to do with it. I was able to use it right away. It is a VERY thick balm, but it melts onto my lips like a dream! And it stays on for such a long time, which is what I always loved about Burt’s Bees. I have always found other balms wear off so quickly, needing frequent reapplication. I think using a high-beeswax formula really helps with this!

Beeswax & Coconut Oil Lip Balm
Equipment:
- Pan deep enough to hold two inches of water
- Small, heat-resistant glass container or measuring cup
- Container for lip balm (can be same as glass container)
- Measuring spoons/kitchen scale
Ingredients:
- 2 tbsp / 24 g coconut oil (I used organic, unrefined extra-virgin)
- 1 tbsp + 1 tsp / 11 g beeswax pastilles or grated
- a few drops vitamin E oil
- 12 drops of peppermint essential oil (can increase or decrease to desired preference, or use different essential oils to suit your preference)
Instructions:
- Add coconut oil, vitamin E oil, and beeswax to the container.
- Fill your pan with hot water, enough to submerge most of your glass container, but not so much that it will overflow it.
- Place the glass container in the water, and turn the stove on. Watch closely until it starts to boil, then lower the heat to keep it at a gentle simmer. Stir the mixture occasionally.
- Once everything is melted and mixed, remove the container from the pot and add the essential oil. Mix gently.
- If the glass container is the final container for your balm, simply cover it and let it cool. If you want to pour it into a different container, do so quickly before the balm starts to set up. It should be solid within 20 minutes.
Notes: For a thicker, waxier balm, increase the amount of beeswax (or decrease the amount of oil). For a more oily, thinner balm, add more oil (or decrease the amount of beeswax).
Conclusion
This is just me documenting how I made my own lip balm for the first time. I think it can be so helpful to share our process with others. That way we can all learn from each other! Please let me know your thoughts and your own methods in the comments! Also, if you happen to make this super easy DIY lip balm, comment below and tell me how it went! I wish you all success in your DIY journeys!


